Intro- Part 1 of coloring Sunny Baby With A Hat by Ashley Scheffler
Hello Everyone. This time I am doing something a little different. I won't have the image completely colored at the end, but instead next tutorial will be continuing with her since there are a lot of fun techniques you can do to the image! Today's technique is going to be about coloring water or ocean.
Lets get started!
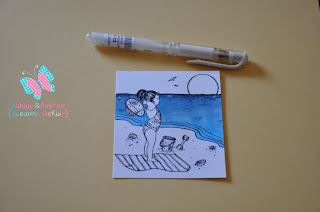
STEP 1
Here is the image we will be coloring today. Perfect time to be coloring a beach image!! You will want to pick your color combos (blues or blue-greens). I use a lot of combos but I seem to always use this one for an ocean image where it is normally darker at the end of what your eye sees and lighter in the front where you first see the water. I will be using B97, B95, B93, and B12. A lot of times I will throw in BG10 as well. I will also be using a white gel pen for highlighting.

STEP 2
Take your darkest color (B97) and shade in the farthest away point and a few of the waves on the bottom where the light would not hit.

STEP 3
Now take your medium color (B95) and go over the darkest color and bring it down more into the front of the ocean.

STEP 4
Take your next lightest color (B93) and continue going over the last two colors and keep bringing it down closer to the beach.

STEP 5
This is where I used B12 and colored in the rest of the water area and went right back over the entire water area to help blend the colors together. I had to do this several times to get the look I wanted.

STEP 6
Of course when you bring your lightest color over your darkest, it will fade it. Repeat steps 1-5 over until you get your desired blending look and how dark you want your darkest color to be and what the contrast will look like.

STEP 7
This is optional but I really like the way it makes the water look and breaks up all the blues. Copic sells opaque paint but I just use my Uni-Ball Signo white gel pen. Just be sure to let it sit and dry for a minute so it does not smear and ruin your coloring you just did! The white resembles the foam that the waves usually make as they roll and hit the beach.
I hope you found this technique helpful. Next time I will be showing you how to color the sand area on this same image!! Please leave a comment if this helped you and what other techniques you would love to learn with Copics!


